Friday, December 17, 2010

Looking Forward

Its always fun to have something to look forward to in the new year. With it sneaking up around the corner, I'm so excited to get going on my new scrapbook called Project Life by Becky Higgins.

Project Life is a simple style of scrapbooking that comes complete with everything you need to complete a scrapbook based on a full year. All I need to have myself is my photos as I take them and a journaling pen.

Confession? The day it was expected to come in the mail, I got next to nothing done. I was so excited that I kept popping over to our main two front doors to see if the UPS man had brought it yet.
Me: *checking my email*
Five Minutes Later: *Looks out living room door*
*Looks out dining room door*
Me: *Doing dishes*
Five Minutes Later: *Looks from the Parlor windows to see
if it is on the left or right side front porches*
Me: *Vacuuming the kitchen floor*
Five Minutes Later: *Dashing to the porches to see if I missed it
while I was vacuuming*

Clearly a productive day. Ha. :o)

After patiently waiting though, it finally arrived!
 Excitedly opening up the box!!
 My kit came with a 12x12 binder (isn't it pretty?!)
Fifty-Six 12x12 pocket page protectors
A date stamp
A larger card to mark the beginning of each week
Day of the week stickers
Four Smaller boxes of journaling cards
Extra 12x12 paper to be cut down to fill pocket spots if needed
12 Clear bookmark inserts to divide the scrapbook into months.


This scrapbook is supposed to be one that reflects on the daily aspect of life, containing photos not only of special days that you want to remember, but also focusing on the normality of life...watching a movie together, eating a meal, sick days and couch potato days... Then, instead of just remembering the special trip or the birthday, it enables you to remember the normal days that can be just as important! 

In theory, one would take a picture every day and make a journaling card for it each day to help oneself remember which day the picture is from! And then a week or two at a time, get photos developed and merely slide them into the pockets of the page protectors near the related journaling card. Talk about easy! :)
I love taking photos but have not had a reason to develop them in quite some time, so this will be just the help I need to be intentional to develop a few pictures each week and remember the simple daily aspects of life.
Something else that has kept me from scrapbooking through college and into our early years of marriage has been the price tag associated with it. Scrapbooking paper is expensive... photo adhesive is expensive... stickers are expensive... and the creative energy to decide just how to set up the page is just more overwhelming than fun. 
But with Project Life, I got a deal! :)

Thanks to a dear friend who introduced me to Project Life, I ordered this album set on Black Friday for just $29.99. A $20.00 savings. And the only other expenses that I will have will be the photos! No running to the craft store when I'm short a few pieces of paper or when I run out of photo adhesive or I don't quite have the right stickers.... Its all here and hopefully a year from now, will be nearly finished! :)

If you want more information about Project Life, click here. :) There are some beautiful new albums for this next year!

Thursday, December 9, 2010

Winter has come to our home

I am so happy to inform you that our first winter in Plymouth, Indiana has been snowy! Apparently, northern central Indiana gets lake effect snow. That makes me happy. Its like Chicago snow! :) 

Our house looks good with snow!
 The trees are bare and frozen on our street!
 The view out our front parlor windows.
 Simple is the theme of our winter and holiday decor this year.
I bought this hurricane vase at the dollar tree, along with the small silver balls. Stabilizing the vase with rice helped to raise the silver balls and add a splash of calm color against the dark mantel. Paired with these pearl berry sprays, its the perfect simple holiday decor.
 For the sticks and candle on the hearth, I merely spray painted some sticks that I found in my own yard. Using rice to stabilize them was perfect. And my little white candle just adds a touch of warmth. I love this because I can leave it up all winter, instead of taking it down after Christmas. Word to the wise if you are considering doing this.... spray paint outside and do it before there is snow on the ground and its only 30 degrees outside. Inside leaves you with too strong of a paint smell with frozen fingers when you move your project outside because you're fearful for your brain cells.... personal experience talking here.
Winter is cozy in our home... especially when we get the chance to light that gas fireplace and enjoy the falling snow!

Sunday, November 21, 2010

Taking a Breather

This has been a busy week. I had four orders to get ready for a few Etsy buyers. Which is completely exciting and what I want! But as with anything, starting out makes everything take longer...because I'm perfecting things such as packaging, mailing envelopes, etc. But here's a peek at what has kept me busy!
These little Monkey Lovin' Baby Slipper shoes have found a home!


And I custom made these Hey Little Diddle shoes with non-slip bottoms for a sweet little boy's tootsies.
 And then there's this. My Quiet Book. Talk about a project that takes a very long time! I forgot to time how long this one took me... but my first book (the one pictured below in the left side) took me over 50 hours. Yes. I said fifty. So that one is staying in the family. Not to mention it was the prototype and did not turn out perfectly. But it definitely helped me determine what I needed to change in the future! But the second one still took me maybe 20-25 hours or so.
Left - Original Prototype that took 50 hours
Right - Second attempt... sold this morning.

 This sweet Quiet Book is perfect for little ones needing a quiet way to keep themselves entertained. It has a four seasons theme, hence the wordless cover. 

Here are the Spring pages. The top book is the first one I did. The binding was such a trouble to me. Plus I blanket stitched nearly everything. Really cute and I liked the smaller size. But the pages ended up squished and it didn't quiet turn out like I had hoped. Below that is the new book with size adjustments to keep the pages from being so squished together.
 Each of the shapes with buttons can be buttoned onto and unbuttoned off of the page. Each spread page has a pocket for any shapes that don't make it back on the page before the road trip, plane trip, or waiting room time are over.
Summer


Fall
Winter
This book found a home today with two sweet little girls.
I do hope to make more in the future and will take orders for them. But it is the sort of project where I will need at least 2-3 weeks to complete it. I've been in crazy mode this week taking care of others. I should have taken a picture of the couch. And the coffee table. And the floor. Felt. Everywhere. My poor husband. But thankfully, it is over! Oh, don't get me wrong. I love making this felt book. But it takes a long time. And it wore me out having to complete it in less than a week. So I will make another. But for now, I can take a deep breath and relax.

Thanksgiving is calling my name. Thanksgiving is in Evansville this year. So excited. Black Friday crazy person shopping, here we come... Toll House Pie, Green Bean Casserole, Sweet Potatoes, Rolls, and Brook-Something Corn with amazing cream cheese. Lots of yummy flavors. I love yummy flavors and variety!

We have so much to be Thankful for this year.... but that sounds like a post for another day!

Saturday, November 13, 2010

Have you Peeked?

......At my sweet little Etsy, Dear Moments
 
I have been having such fun doing outside photo shoots of these sweet little guys. They pose just where I want them too and are so cooperative! If only the lighting where just as helpful! ;)
I've been sitting in my front yard, in the midst of leaves, sticks, and grass, trying to get the perfect shots to show off the character of these little cuties!
(I just don't know why so many people who have driven and walked by while I'm shooting photos have given me weird looks...like "um...why are you sitting in your front yard with a camera and tiny shoes.....?"
Come on, people! That isn't weird at all! *tee hee*

After all that photography, I've finally listed a few more things! 
Take a peek and let me know what is your favorite!
Know someone with a little kiddo who might need some toasty baby shoes this winter? Tell them about Dear Moments.

Going to a baby shower sometime soon? Go with something unique: Baby slipper shoes from Dear Moments!
Don't forget... 
There are only 42 days, 11 hours, 34 minutes, and 4 seconds of shopping days until Christmas! :)

Who is on your list this year?

Wednesday, November 10, 2010

Surprise Revealed!

Surprise!

After a month of planning and organizing, I am so pleased to announce the opening of my new Etsy Shop:
Dear Moments

I only have one item posted right now. I plan to post more this week, but I need to get a few more marketing photos before the baby shoes section can be revealed. Don't worry. I'll let you know when the baby shoes are posted too! Until then, get familiar with my Etsy Shop and save it to your bookmarks so you can peek at it later this week!
He's just smiley excited!
 

Tuesday, October 26, 2010

I know it has been too quiet here...

But I've been busy...

You see, this little fellow has been begging for my time and attention...
And I've been cutting out felt shapes for days...
And I've discovered the amazing fun of sewing tiny baby shoes...
 
 Baby shoes that are as soft and cozy as they look!
 I spent more than an hour in JoAnns yesterday. Yes. Our tiny JoAnn's in Plymouth, Indiana.
I just kept walking up and down the fabric aisles. Trying to pick some tiny print fabrics for my next few pairs of baby shoes.
I fell for this sweet "Hey Diddle Diddle" print...
 And these little monkey friends begged me to take them home.
I've always had a soft spot in my heart for monkeys! : )
I'd encourage you to stay tuned even though I've been uncharacteristically quiet these days.
A surprise endeavor may soon be unfolding...
...one that requires me to be diligent in crafting and sewing daily!

And it will be worth the wait! 

Wednesday, October 13, 2010

Felt Frenzies

I've gone a little nutty over felt lately. At .29 cents a piece, it makes for an inexpensive craft. My mom got this idea off Better Homes and Gardens' webpage. We made the black one together and then I had to come home and make another one myself! :)

Meet Boo Boo Kitties:

Yes, they are made out of felt, embroidery floss, cotton stuffing, ribbon, and are sitting on pencils.
They are good friends :)
 Meet Owly .... Owly isn't quite up to par yet. A little too much stitchery detail and not exactly as I had pictured. But an attempt and a chance to learn what I like and don't like as much.
Time to try again....

Thursday, September 23, 2010

DIY - Small wooden signs

Recently at the Plymouth Blueberry Festival, I found so many neat craft ideas. I really like small wooden signs with cute words or phrases. Because they are small pieces of wood with some paint on them, it seemed a little silly to pay $3-$7+ for them when I could make them myself for a fraction of the cost!
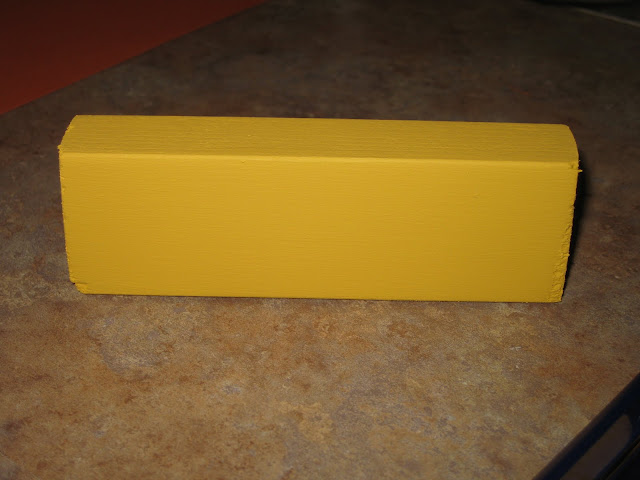
I found this piece of wood at Lowes for $1.80. It was 1" by 2" & 6' long.

After you have your wood and your hand saw, decide how long of a piece you will need for your word or phrase. To do this, it is best to print off similar sized words or phrases onto plain computer paper and use that to determine the length of wood you will need.  I used pieces that were 3.5-5 inches.


It doesn't matter if your cut is perfect. I had to cut slowly and only in one direction to keep it from splintering a lot on the ends.


Next, take a piece of fine sand paper and sand the small piece of wood, wiping the dust off with a slightly  damp microfiber cloth. Now you are ready to paint it.

I found my paints at Jo-Ann Fabrics for about .89 cents each. Any brand of craft paint (or even spray paint or a quart of paint) will work. Priming is optional, but probably not necessary. I did not prime my pieces before painting them. 

Next, paint your wooden blocks. I gave my blocks two to three coats. Use more or less as needed. I used small foam brushes and they worked very well for me.


I chose to use computer font on my blocks because I do not have a steady hand for painting tiny words. I found that I had a few pieces of color coordinating scrapbook card stock that would coordinate with the colors of paint I was using. I used a printer to print the word onto the card stock and cut it to fit the front of my blocks.


Using Mod Podge, cover the "front" of your block with a thin layer.
U

Carefully place the card stock on the front of your block, using the Mod Podge as glue.


Use a card to smooth the piece of card stock onto the wooden block.


Then paint Mod Podge over the front of the block. If you are using paper with computer ink on it, be careful to only brush over the ink a few times for your first coat of Mod Podge or the ink may smear. After your first coat is dry, the Mod Podge will project that from happening as you do additional coats on the front and all over the block. Painting and Mod Podging are the lengthiest part of this craft, so make sure you find something fun to do while they dry. I did 2-4 coats of Mod Podge. I used Matte finish Mod Podge but Satin or Gloss would work just as well.


I made a total of three Autumn word signs:
"Pumpkins - 5 Cents"

"Autumn Blessings"
And "Harvest Moon".

Time to have fun playing around with various tablescapes! :)

Total Project Cost:
Wood: $1.80
Paint: $2.70
Card Stock: $.60
= $5.10 for three signs.
Plus, I have another 5 feet of wood to make more!

 This is just me.... enjoying the simple things!

Thursday, September 9, 2010

Sweet curtains

Welcome to our back door. Nevermind the fact that it is an old door, and it seems to be hanging a little crooked. Nevermind the crooked hanging curtain (at least I can say that I didn't hang it so it isn't my fault that it is crooked). It is our backdoor and I invite you to take a peek at the transformation that it experienced today.


Our doors have these large window panels. They're an odd size. You cannot buy curtains this size. I tried. They don't sell them in our little town. So I had to solve this problem myself. The old curtain was dirty. It blended in. It didn't pop. And, really, it was just too bland.


Clearly, a sweet lavender gingham would much better suite my backdoor. So much more welcoming. So much happier. The color went quite well with the kitchen. It would add just the perfect touch. 


I spent the majority of the day cutting, pinning, and ironing. The dishes? They're still in the sink. The letters that need mailed? Forgotten. The other plans that I had for today? Ignored. Cutting, pinning, and ironing seriously takes a lot of time. (especially when you are inventing the pattern as you go...)


The end result? Perfect. Exactly like I had envisioned. The color popped. The gingham made it warm and welcoming. The little ruffles at the top made me smile.  : )


The fact that they are two panels allows me to open them and let natural light in which was so important to me. Then, at night, I can close them so that the neighbors won't see me scurrying to the fridge in my pajamas to get a glass of water. : )

Borrowing my mother's sewing machine has been inspiring me so much to get some projects done around the house. Sometimes, that means other household things get put on the back burner... but sometimes, that is just the way it has to be. The dishes will wait. Letters that need mailed don't complain much. And I've still got a bit of my afternoon left... The weather is beautiful and I think that means I should walk to the post office and soak in the taste of fall that is in the air!